Antimalware for SMBs: 7 steps to protecting your business with Emsisoft Management Console

We designed Emsisoft Management Console to make life easier for security administrators. The web-based platform enables you to monitor and manage all your Emsisoft-protected devices from a single dashboard. Whether you want to deploy our software, apply protection policies, run scans or respond to alerts, Emsisoft Management Console allows you to perform the exact same tasks you could if you were onsite.
Ready to get started? Protect your business with Emsisoft Management Console in seven simple steps:
1. Sign up for a trial account
The best way to see if an antivirus product will meet the needs of your business is to test it out. We offer a 30-day free trial of Emsisoft Business Security, which gives you full access to all of the software’s features – including Emsisoft Management Console.

Sign up for a trial account
To get started, sign up for an Emsisoft user account and login at MyEmsisoft.
2. Create a workspace for your organization
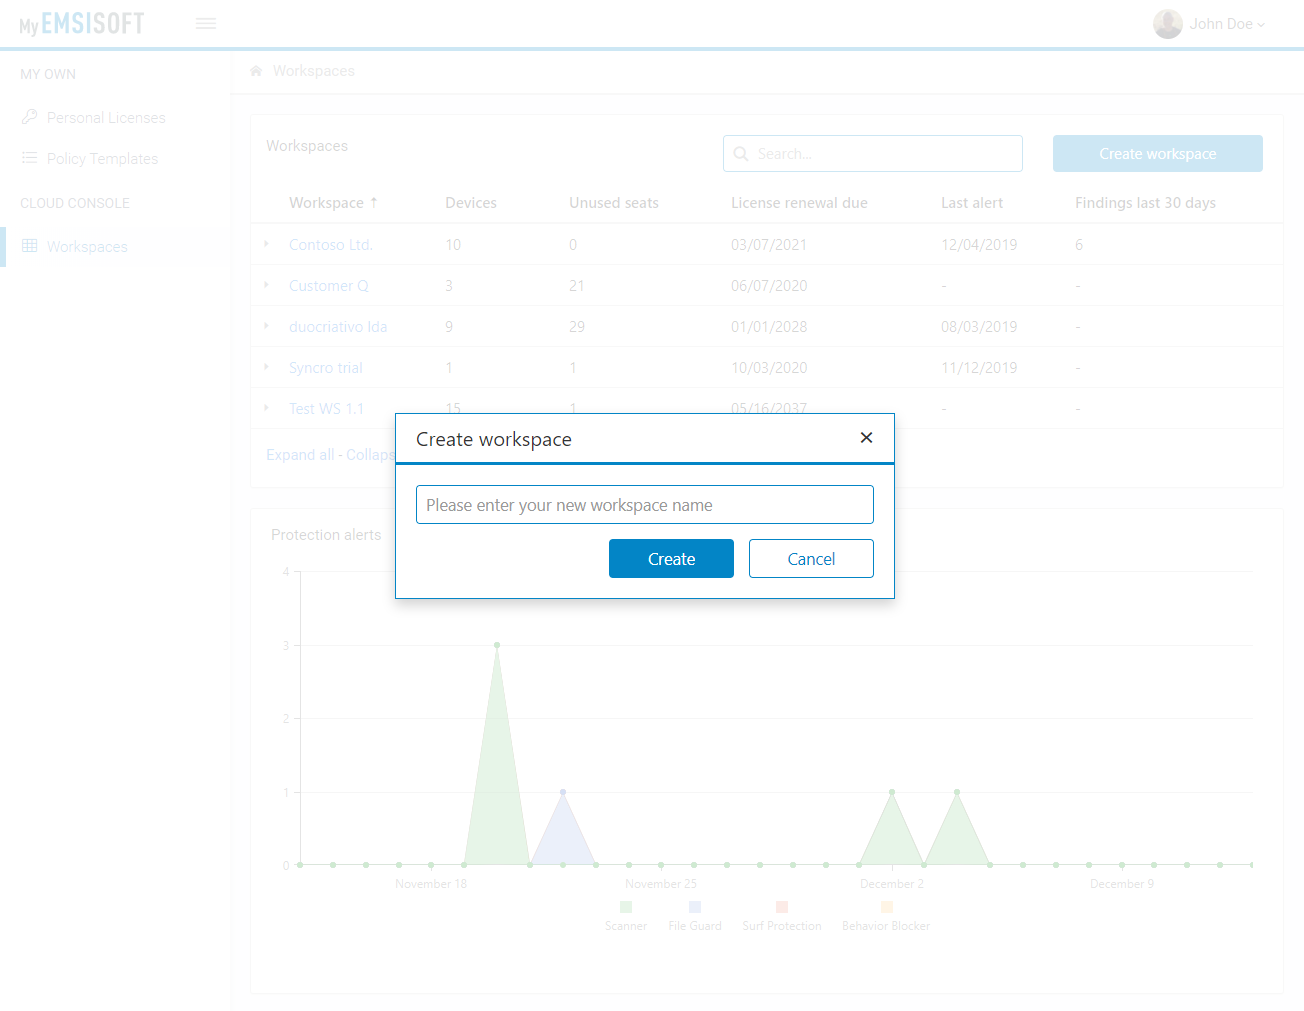
After signing up for a trial account, the next step is to create a workspace for your organization. This will enable you to manage all the Emsisoft-protected devices in your company from a single dashboard.
Create a workspace for your organization
To create a workspace for your organization, open MyEmsisoft, click ‘Workspaces’ in the ‘Management Console’ menu block, click the ‘Create Workspace’ button and enter a unique name for your workspace.
3. Add devices to your workspace
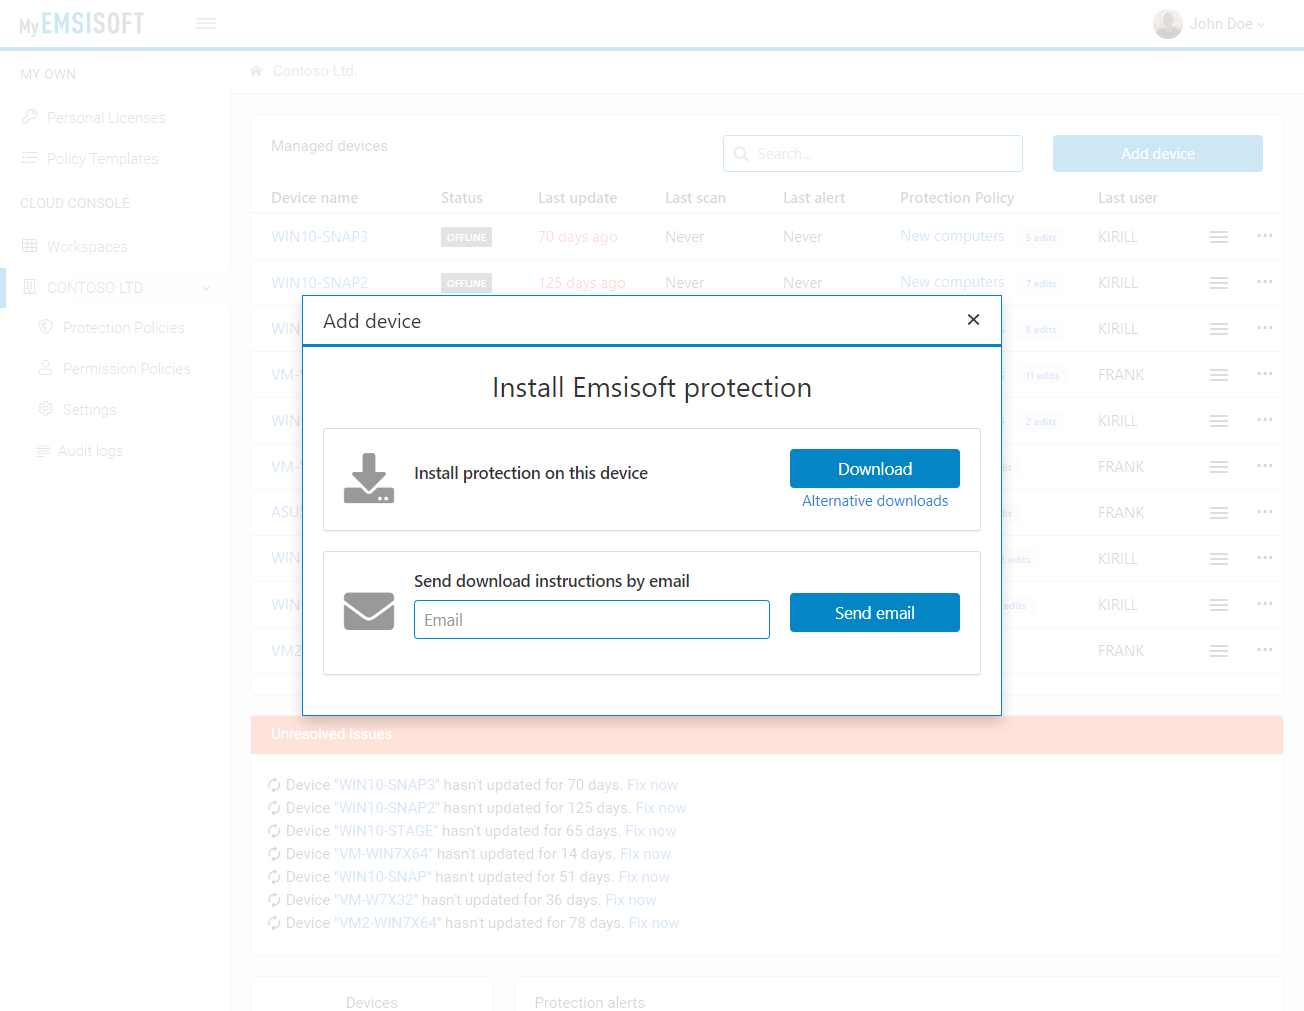
Streamline security management by adding all your Emsisoft-protected endpoints to the workspace you created in the previous step.
Add devices to your workspace
To add devices to your workspace, navigate to your workspace overview panel and click the ‘Add Device’ button.
Select the option ‘Install protection on this device’, which will immediately download your workspace-specific installer. After installation, the newly protected device will automatically be added to your workspace.
We also offer a range of alternative installers for specific special use cases, which can be found here.
Handy tip: by using your custom installer, you won’t need to log in or enter a license key on the protected device. The installer comes with an authentication token that makes sure the device directly connects to your workspace. We recommend changing your token at regular intervals or when you suspect that someone has gained unauthorized access to it. The authentication token can be reset in the ‘New devices’ protection policy.
4. Create and apply policy settings for your teams
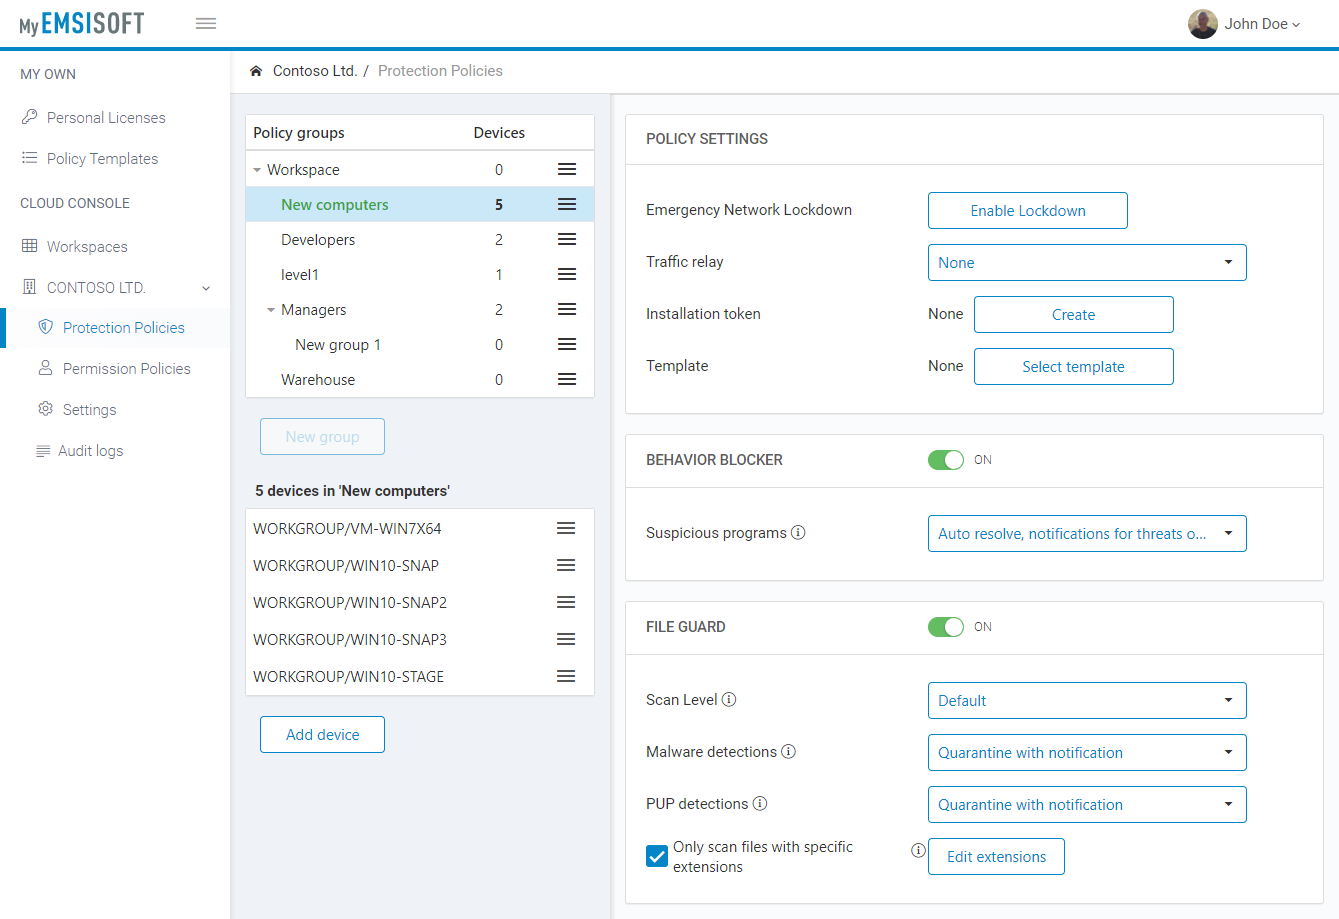
Configuring the protection settings of every individual device is a time-consuming process. To help you save time, Emsisoft Management Console allows you to create and edit protection policies and apply the settings globally or to selected groups of devices.
We recommend creating groups based on the structure of your organization and applying settings that reflect their needs. For example, your tech teams may want more local control of protection features, while other departments might prefer a more “auto-pilot” operation.
Create and apply policy settings for your teams
To get started, navigate to the ‘Protection Policies’ panel, where you can create new groups, add devices to groups and modify group settings.
Handy tip: You can drag and drop devices from one group to another.
5. Run malware scans on all devices
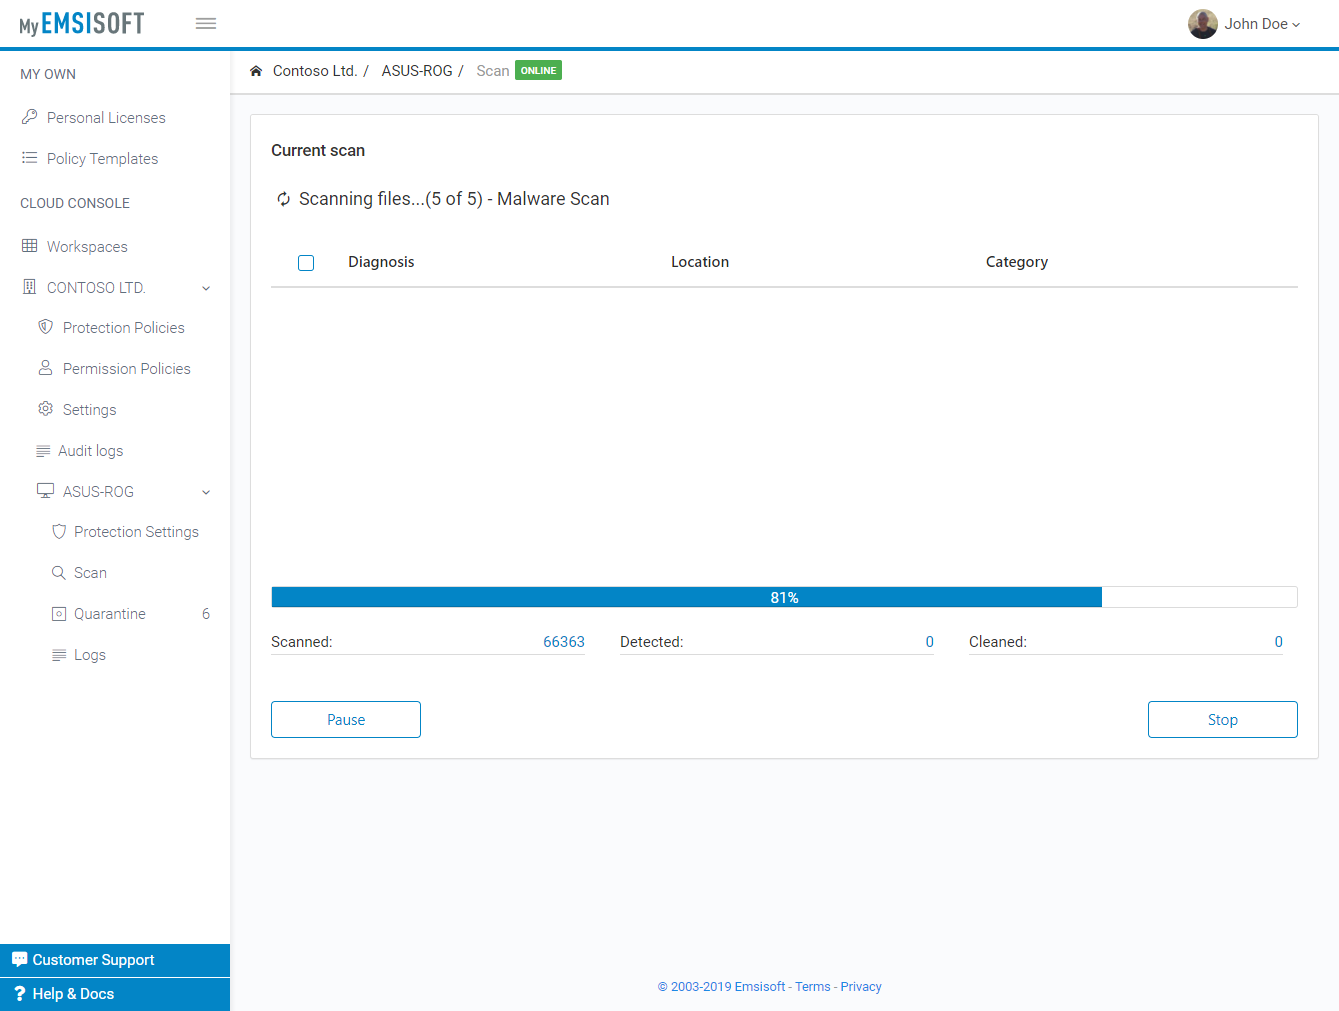
After installing your Emsisoft protection software, we highly recommend running a manual malware scan on all your devices. This ensures that the system is clean and allows the real-time protection components to function effectively moving forward.
Run malware scans on all devices
To run a scan, navigate to the device level that shows a visual representation of what your user sees on the desktop and hit the large blue Scan tile at the top.
After the scan is complete, have a look at your workspace panel to check for alerts and to verify which devices are protected.
6. Set up notifications in workspace settings
Emsisoft Management Console’s notification system alerts you when an incident occurs, allowing you to resolve issues efficiently and reduce response time.
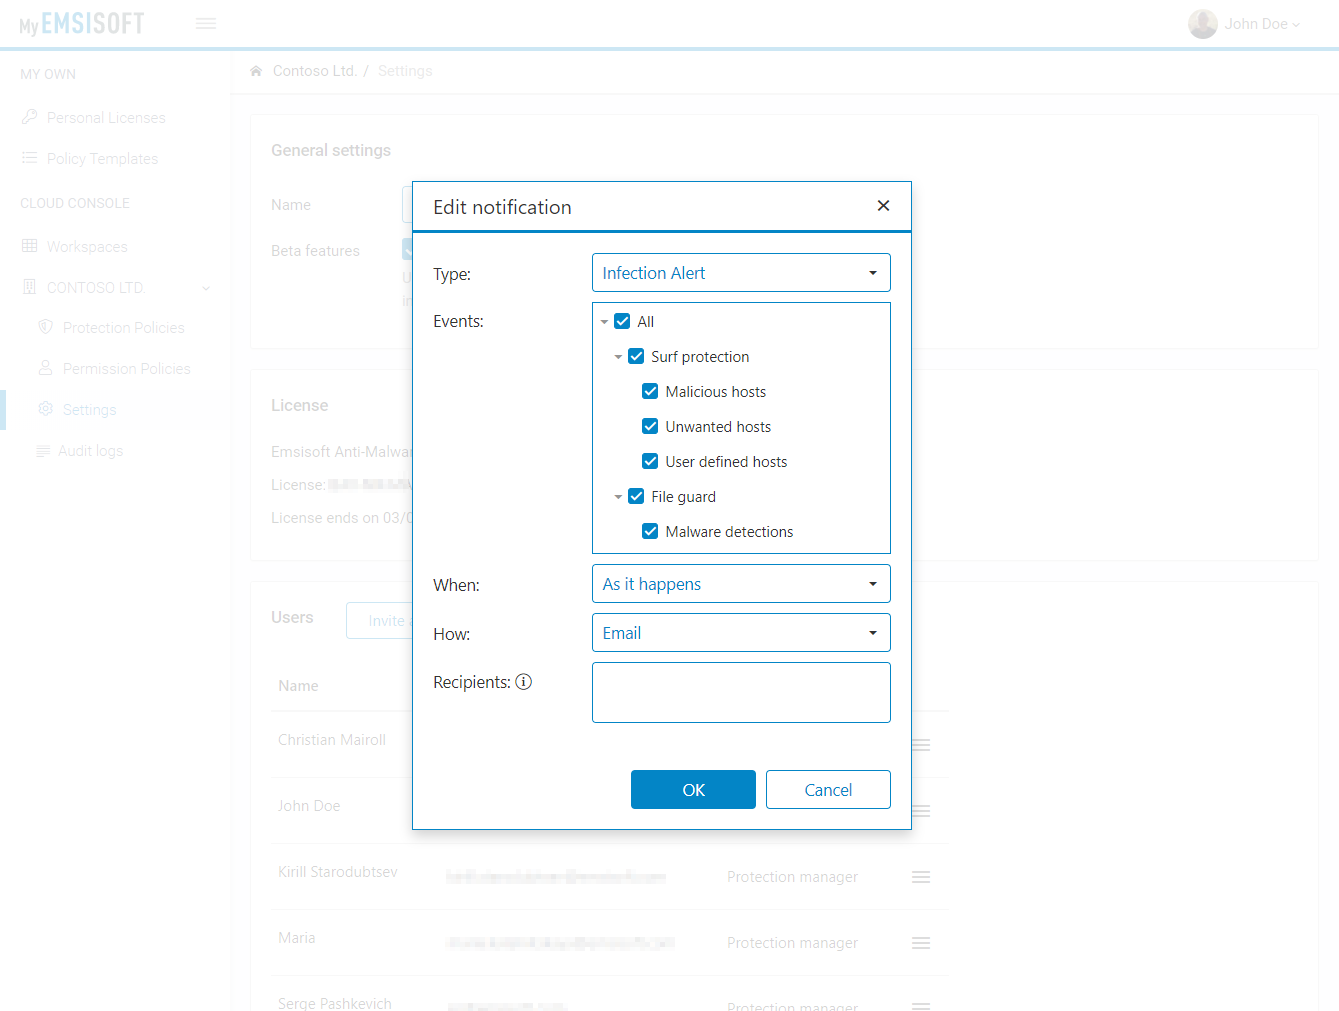
Set up notifications in workspace settings
To set up notifications, navigate to the bottom of the workspace settings panel, where you can select which protection components you want to receive notifications from.
You can also quickly fix issues directly from the dashboard by clicking ‘Fix now’ in the ‘Unresolved issues’ section.
7. Buy a license before the trial runs out
To keep your business fully protected by Emsisoft Business Security, make sure to purchase a license before your trial period runs out.
Emsisoft Enterprise Security + EDR
Robust and proven endpoint security solution for organizations of all sizes. Start free trial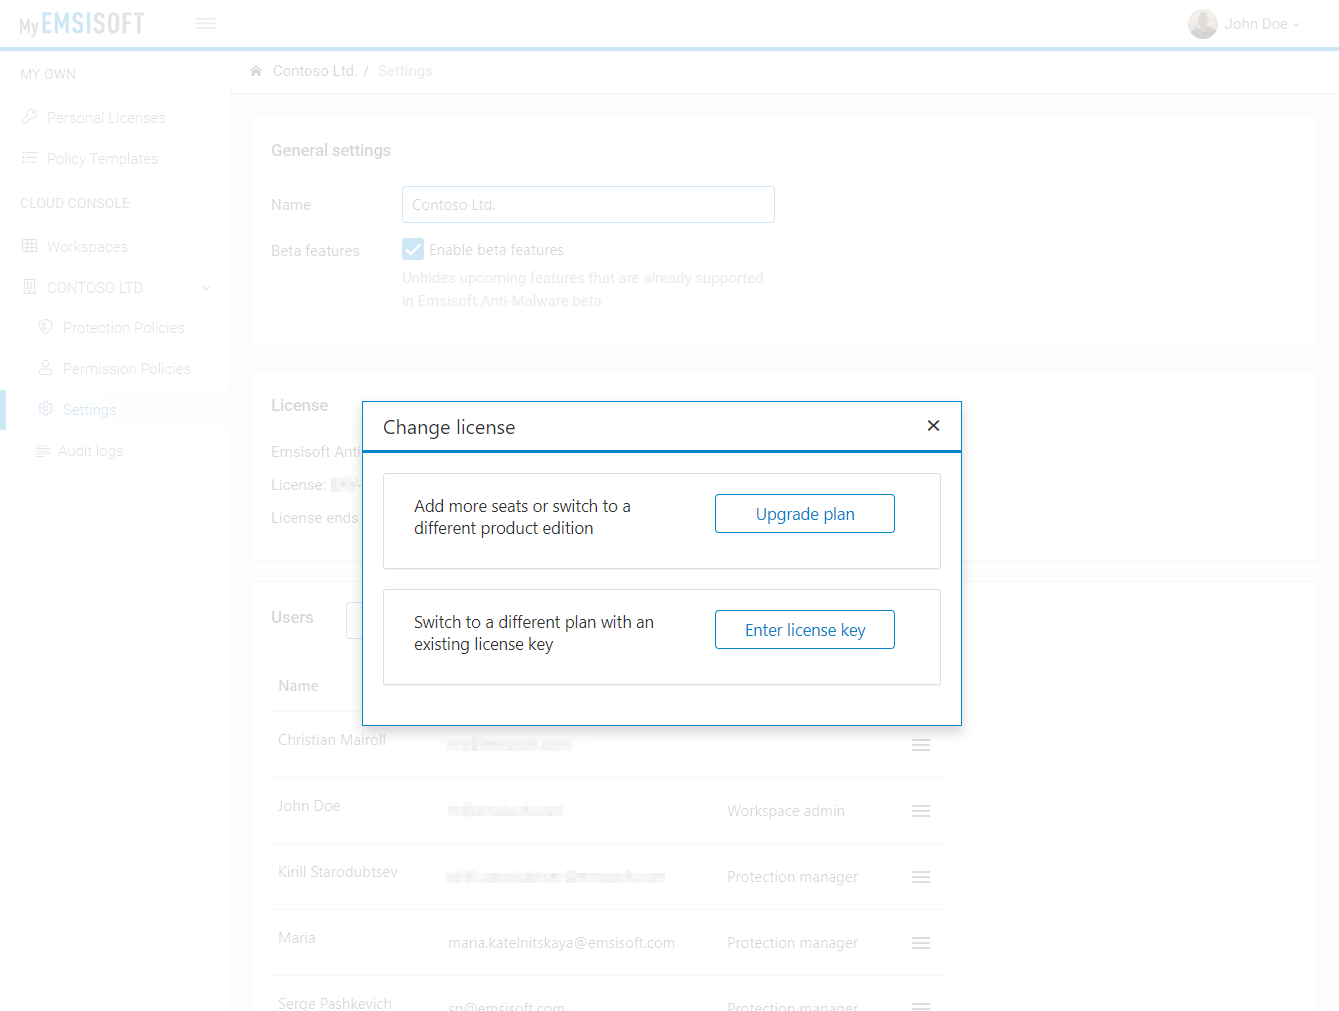
Buy a license before the trial runs out
You can purchase a license here, which can then be inserted into your product via the ‘Licenses’ panel in Emsisoft Management Console.


